Showing posts with label diy. Show all posts

04 October, 2013

the pom pom party - the credits

Hi there! So there has been a little bit of interest in the pom pom party, which I had not quite expected!


I wanted to post about where I got the various ideas I pulled together for the party....

I have been collecting party ideas since I started out on Pinterest, and my party board is constantly being updated. I follow people who I know have brilliant party ideas and repin them as they pop up. As well, some clever bloggers I follow throw fantastic parties  - I pin their ideas too! My aim is just to make a collection of great ideas that I can use as a resource later.

So initially, I wanted to throw my one year old a confetti party, but it all just started to feel too tricky. Then my very brilliant designer sister in law decided she was throwing a rainbow party for her son (only a week older than Baby Pickles), so I decided to shift away from confetti.

So pom pom it was! I decided to stick with the confetti -funfetti?- cake, but add pom poms. I had pinned a number of these, but this one was probably my favourite, as I also loved the finish on the icing on the cake.
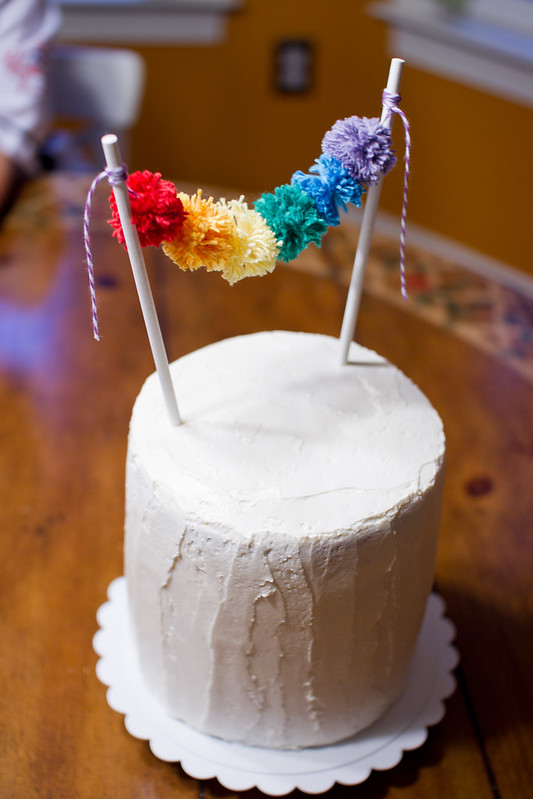
Rainbow Birthday Cake
 
After some how to ice a cake advice from this blog, and adding in sprinkles in between the three layers, a pom pom cake topper, and a cute vintage thrifted deer, my Baby's cake was done!


Okay, so the next thing: the baby banner! This idea was a direct copy from Stephanie at Simply Radiant . I tried to include one photo from each month of Baby's life and include different faces - happy, sad, funny etc... I was really happy with how this had turned out, and it is now hanging across the wall in Baby's room.

I had a bowl of pom poms on the table, just for the cute look, and then we had those big paper poms hanging from the trees - we can pick these up here really cheaply in $2/bargain shops.

Of course, we are so lucky to have such a beautiful garden, and it was such a beautiful day! It was only at the last second that I decided to pull out the "Christmas linen", which is why it has very clearly not been ironed! (Come on, I may be crafty, but I am not superwoman!) I wish I had thought of that a touch earlier.

I will pop up the printable thingy that I made to go in the party bags for the kids to take home with their pom poms, some time in the next week (or so).

Take care, happy crafting xx


23 May, 2013

trackie thursday!


Yay! Another week, another trackie thursday.

For those of you just tuning in, trackie thursday is our slow day. No preschool, no playdates, no swimming lessons, no reason to leave the house, or even get dressed. trackie thursday is our day of rest.

Today we did have some friends pop in in the morning, but then all was quiet, it clouded over and got seriously cold. We braved the cold for our daily walk, and then got home with still 90 minutes to go until bathtime and the nighttime chaos/rituals.

So, remembering a fine idea I had seen recently on pinterest we set out to try to make one of these:


Now, I don't know about your kids, but my kids just don't make stuff that looks like this (perhaps they may one day). Instead, we made something that looked a little more like this:


So theatre designers we may not be, but it seems panto performers we are! We all happily whiled away nearly two hours on the making and then the performing and watching. What great fun! And of course, the dinos had to be in the audience, too.


Have a happy week! xx

12 April, 2013

feeling pinspired...

Hi again!

Now all three boys are going to bed (dare I say/write that 'out loud'?!), I have rediscovered the joy of evenings and time. Feeling pinspired last night I whipped up this little beauty:


Love the hand on the hip? Our gherkin's natural "I'm being photographed" pose - love it!

Note the monster patch on the knee. These jeans were favourites for ages until the gherkin's knee went right through them. This is not an original idea (seems I am all out of those at the moment - perhaps too much time spent on pinterest) but comes from refashion co-op (who apparently was inspired by someone else).

I did this job by hand, only because I was too nervous to unpick the seam and re-sew, but next time I will be braver. After all, Miss Cintia offered a really good tutorial on how to do this some time ago, that I have been waiting to use... next time!

Doing it by hand and stitching these on without unpicking the seam was tricky at best and a massive pain at its worse. The most difficult thing was my laziness and wanting to stitch on the teeth and mouth at the same time. Really it would have been simplest to either stitch the teeth to the red mouth or stitch the teeth to the jeans as step one and then the mouth to the jeans as step two. But no, I pinned it all on at once and then proceeded to stitch all layers together at once. Madness! And frustrating! (and causing me to spend way too much of the evening with my tongue poking out and eyes half-crossed).

But, the story has a happy ending! The Gherkin loved his new monster pants, so much that we had to Skype the grandparents immediately, and Little loved them so much that he started nagging for his own "dinosaur" pants.

Happy weekend! xx

24 February, 2013

speaking of husbies felting woollens...

 
So, once upon a time I had a favourite cardigan. Pure wool, picked up from an opshop (thrifted) for eight dollars and big enough to keep me warm through my first highlands winter, belly swelling with bub number three.
 
Mr Pickles did me a favour a couple of weeks ago by washing all of my woollens and then popping them into the dryer. And voila! Felt ;)
 
Once I finished sobbing (kidding) I decided to make myself a beanie.
 
It was a piece of cake really:
 
   
1. With my cardi flat, and inside out, I traced around the shape of a favourite beanie
2. And then stitched along this line
3. And then cut the stitched beanie out of the cardigan with my pinking shears
4. And turned the completed beanie outside out
5. Done!
6. Oops! Not quite. A few vintage buttons later and...
7. I had a new, cute beanie to wear! I really should have been looking more excited, but I was too busy trying to take a self portrait (it's nothing short of a miracle that my tongue's not sticking out).
 
 
And just in time for an unseasonally chilly, wet highlands day.
 
How about you? Have you done anything with felted woollens? I now have quite a collection to my name, so I'm on the lookout for new projects ;)

Chat soon xo


17 February, 2013

pom pommerific!


I have a dream of one day doing my big boys' bedroom up in nautical colours (not a nautical theme). At the moment it is... let say, eclectic (the reason you won't see any photos of that room on this blog for quite some time!). Today, I promised them if they went to bed like big boys, I would make them something new for their room for bedtime tomorrow night. I am part of the way there! Hoping that the two wee boys may give me some time tomorrow to do some more pom pom making and complete the project by bedtime.

Hope you've been able to squeeeeze some crafting into your weekend too.
xo

16 February, 2013

doing better. and making stuff, too

Hi there!

Guess what? I have been crafting! Somewhat boxed into a corner, with a little friend's birthday party here all of a sudden and my inability to face putting the three boys in the car and driving into a local town to a toyshop, I had to make something. And so I did - voila!


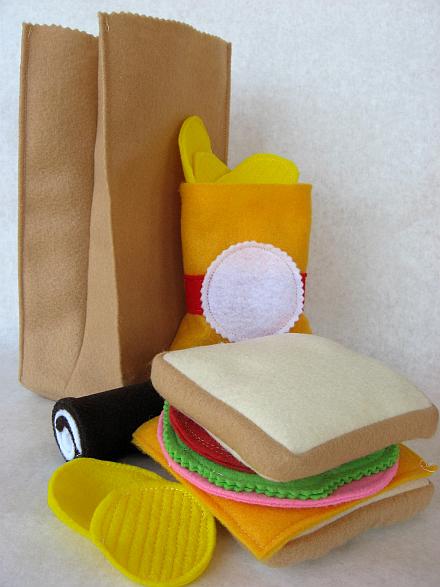
My apologies for the crumby, crumby photography - this was taken using my dodgy ol' mobile phone on our way out the door to the party. It's a 0s and Xs (tic tac toe) set in a bag! I would love to take credit for this original idea, but it was absolutely inspired by the work of others, including:


Now I'm wishing I had taken a better photo of my effort (and wishing I had also had blue felt in the stash, to use instead of the yellow.. never mind!). I was so proud of this effort today, which was actually completed within a typical crazy day with three boys under five!

Doing better on the being more kind front. I find that the hardest thing about three small people is the constant lack of sleep. I know that this has spoken about by others, more eloquently elsewhere (like here), but sometimes, what I wouldn't give for twenty four hours filled with a solid night's sleep, a slow start and an afternoon nap! It is absolutely the key to my mood and my ability to be a great mum to my three beautiful boys. So, what to do in the absence of sleep? Fake it! I am trying to plan ahead distractions for the boys, and funny stuff too - silly things that will break the tension when these build. So far, so good.

Hope your weekend is a wonderful one xo

28 October, 2011

successful refashion! man's shirt to a woman's top


Well hello there! Sorry about only revealing the lower bit of my face - have had a shocking haircut, and am hardly ready to face the supermarket, let alone the world wide web ;)

There's been some sewing going on here, brought on by our recent hot weather.  In a moment of desparation I found myself an old shirt of Mr Pickles' (in the charity bag). Grabbed an old favourite dress and two and a half hours later, voila! A new top.
Firstly credit where credit is due. I spotted these images on pinterest and have been thinking about making something similar ever since....

sewing class dress

So here is my first bash a sewing tut! I think now I could knock one of these tops together in very little time, given that most of my two and a half hours was spent scrunching up my face, tilting my head, wondering if this was actually going to work out...

But before we begin, some warnings...

1. I am a super-beginner sewer
2. I have no sense of what may be considered "right" or "wrong" in terms of terminology, techniques, etc
3. I failed Textiles and Design at school, two years in a row. My teacher, Mrs Button (her real name), was very concerned that I was not going to find myself a good husband.

So, here we go ;)

Step 1.
Find yourself a men's business shirt that is too big. Lay it flat on the floor, facing up.


Step 2.
Get a favourite, non-stretch dress, with a shape you like. Lay this on top of the shirt and use as a pattern template - don't forget your seam allowances! Cut the sleeves to the length you would like.

Step 3.
Create the neckline of your top. I look terrible in collars, so removed the collar altogether and cut the front and back pieces to the neckline shape I wanted.


Step 4.
I did a tiny rolled hem/seam (sorry! don't know the right terms) on the neckline, and sewed up the front  centre join up to the second button - I still needed to unbutton the top button to slip the top over my head.


Step 5.
Try on for size. Stitch up the side seams, making any adjustments before you go to the next step. I did the same rolled seam/hem thingy on the short capped sleeves. I found this a bit fiddly and tricky - there is probably a much better way to do this.

Step 6.
Now you can have a look at the shirt length. Mine was too long for a top and too short for a dress. So I chopped it. But I still wanted the rounded bottom, like you get in mens shirts. So I used the shirt's original bottom to take the curve and then transferred this curved line higher up the shirt. And then I trimmed the excess and created another rolled hem along the bottom.


Step 7.
Next stop, show and tell to someone who'll listen, followed by a walk out and about to show off your talents! Oh, and of course, a celebratory Tim Tam.
Will try to get hubby to take a glam shot of me later in the week, wearing the shirt in question. Perhaps pre-drool/snot, play, rolling in the grass etc, unlike in the first shot in this post!

Chat soon lovelies
xo

21 June, 2011

work in progress... sunnyside up!

  Hello!

I have been busy, not doing anything too exciting that no one has done before, but crafting felt food for the gherkin's (shhh) birthday present.

I am pretty happy with my eggs (easy) and love my pile of beans! I am now a complete convert to wool felt - this process has shown me just how much better wool felt is to work with.  My bread is ok - love the shape and thickness, although if I had my time again I would make with quilt wadding rather than just stuffing it with polyfill, so it didn't puff up too much. I am very unimpressed by my first watermelon attempt - I think I really have to make a three dimensional slice,rather than trying to cheat with a flat version! Cheating never pays...


Sadly, I am only able to handstitch these, as my machine is strictly off-limits at night due to our teeny weeny new home in Sydney and our very light sleepers...
So, next on the list is... more fruit and veg. Because the gherkin has significant allergy to nuts and peanuts (and not long ago, sesame too), he hasn't eaten much packaged food, so all of the foods I will be putting in his kitchen will be the key staple sorts of foods - bread, pasta, fruit, veg. I also want to make up some cartons for milk etc. And bought a small variety pack size box of weetbix (you know the single serve sized boxes) yesterday just for the box! (weetbix is the only cereal we can eat in this house when mummy's not doing porridge).

I have been super-inspired by a number of felt food genii (?the plural for genius?) on the net...

amazing range (and diy e-books for purchase) from lilly bean


plus many many many more.... it seems the world loves felt food. My Pinterest has been getting a real workout!

Have fun, I'll check back in shortly with another update.
xo

30 May, 2011

shhh! (secret squirrel)


Shh! Secret squirrel post below...

I have another little boys' birthday coming up. The gherkin is turning three! Already...

And there is one thing that he love love loves at the moment - pretend play, especially relating to cooking, or picnics or cafes (gives away how we spend much of our time, really). So (shh) for his birthday he is getting something very exciting. A kitchen! So I have been trawling the net, looking for play kitchens online, cause this is something I want to make myself.


I thought before I start, I might include some inspiring images. These are some of my very favourite toy kitchens from around the web. Enjoy!


I will be posting here as I get mine going, as well as posting my felt food successes (and messes!). I know, the web is already overcrowded with pictures of toy kitchens, but this one is for a boy, and my boy, to boot.

Chat soon xo

Thanks

to my other half who puts up with the mess, makes me happy and keeps me sane.
to my beautiful boys who give me so much i want to remember and make the everyday something to treasure.
to my mum who alway let me play with fabric and the good scissors, and who knows a lot of songs.
to my dad who was always happy for us to make a mess and who laughs at us when we deserve it.
to both parents for making sure i still got the work done.
to my dear friends for listening and for sharing the laughs.
and, to you for visiting!