28 October, 2011

successful refashion! man's shirt to a woman's top


Well hello there! Sorry about only revealing the lower bit of my face - have had a shocking haircut, and am hardly ready to face the supermarket, let alone the world wide web ;)

There's been some sewing going on here, brought on by our recent hot weather.  In a moment of desparation I found myself an old shirt of Mr Pickles' (in the charity bag). Grabbed an old favourite dress and two and a half hours later, voila! A new top.
Firstly credit where credit is due. I spotted these images on pinterest and have been thinking about making something similar ever since....

sewing class dress

So here is my first bash a sewing tut! I think now I could knock one of these tops together in very little time, given that most of my two and a half hours was spent scrunching up my face, tilting my head, wondering if this was actually going to work out...

But before we begin, some warnings...

1. I am a super-beginner sewer
2. I have no sense of what may be considered "right" or "wrong" in terms of terminology, techniques, etc
3. I failed Textiles and Design at school, two years in a row. My teacher, Mrs Button (her real name), was very concerned that I was not going to find myself a good husband.

So, here we go ;)

Step 1.
Find yourself a men's business shirt that is too big. Lay it flat on the floor, facing up.


Step 2.
Get a favourite, non-stretch dress, with a shape you like. Lay this on top of the shirt and use as a pattern template - don't forget your seam allowances! Cut the sleeves to the length you would like.

Step 3.
Create the neckline of your top. I look terrible in collars, so removed the collar altogether and cut the front and back pieces to the neckline shape I wanted.


Step 4.
I did a tiny rolled hem/seam (sorry! don't know the right terms) on the neckline, and sewed up the front  centre join up to the second button - I still needed to unbutton the top button to slip the top over my head.


Step 5.
Try on for size. Stitch up the side seams, making any adjustments before you go to the next step. I did the same rolled seam/hem thingy on the short capped sleeves. I found this a bit fiddly and tricky - there is probably a much better way to do this.

Step 6.
Now you can have a look at the shirt length. Mine was too long for a top and too short for a dress. So I chopped it. But I still wanted the rounded bottom, like you get in mens shirts. So I used the shirt's original bottom to take the curve and then transferred this curved line higher up the shirt. And then I trimmed the excess and created another rolled hem along the bottom.


Step 7.
Next stop, show and tell to someone who'll listen, followed by a walk out and about to show off your talents! Oh, and of course, a celebratory Tim Tam.
Will try to get hubby to take a glam shot of me later in the week, wearing the shirt in question. Perhaps pre-drool/snot, play, rolling in the grass etc, unlike in the first shot in this post!

Chat soon lovelies
xo

18 October, 2011

distractions

Okay, I am a lot less productive than I would like to be on the crafting front. And today's post is really just a chat about nothing much - cute toys on the internerd, new books on the shelves....
However, big news!!! We have decided to move (again) --- this time to the country. The Southern Highlands of NSW beckons, so we are working out a way to be there by January next year (in time for the new childcare/working year). We are a restless bunch.
The boys are growing. The Gherkin has discovered Patti LaBelle and is in love (his spontaneous dancing to her album this week was amazing), and Little Pickle greets his dad by singing "Daddy, Daddy Cool". Too funny.


Oh! and The Gherkin met the lovely Justine Clarke at a recent concert. They spent their time after the concert comparing outfits. The Gherkin is a shy wee thing, and she gave him loads of time to warm up - we were very grateful.

I have found a cute cute cute site that translates text into old school library catalog cards --- here's a fun one made up for the hubby. Not sure how I might be able to use this, but...

Have just noticed I got our wedding date wrong! Hilarious (only out by four years...)

On other distractions, I have also found the site (that probably everyone else has, too) Two of Us. Heard of it? If not, the concept is, you take an image of your smile, send it over the internerd and instantly get one back from a stranger. That's it. I thought this was a really cute, fun idea, until I tried to send a photo of my smile... apparently my smiles are not convincing?


--- this looks like a genuine smile to me?

Perhaps I have struck a problem for people with gummy smiles? I remember some years ago when my brother and I were getting professional photos taken for our mum and dad, we were told by the photographer to "turn down the gums", as our gums were "reflecting the flash" and "ruining the photos". This led to many year of awkward fake smiles in photos... only now am I getting my real smile back.

Perhaps for Two of Us I should try a smile with low levels of gum exposure? It's just too sad offering up your real smile and getting back: "we're using a fancy machine to make sure you're smiling, and it appears you are not. Perhaps you should try again?"


My gummy smiles were returned as unsatisfactory by the machines (five times) - perhaps I will try with my mouth shut...

Really, all this smiling at the computer - I really should have been sewing!
Here are the books I have been reading this past fortnight - hooray for a great local library!!! (And at least I have been reading).
Stitch Style Bags: 20 Fashion Knit and Crochet Patterns (C&B Crafts)  

Chat soon lovelies xx
ps. for those interested, the closed mouth smile didn't work either... that said, it was a shocking fake!


11 October, 2011

sticking to a (yummy) budget.... oh, and more crochet


Today I bring you delicious leftovers! And a new crochet pattern discovered.

This week, we revisited our family budget. Because we have now been on one income for more than 18 months. And this wasn't part of our plan. However, daycare waiting lists being what they are...

So working to a budget are we! How do we do it??? Leftovers (oh, and staying in, and opshop adventures).

Yummy. Leftover pumpkin risotto, wrapped around a small cube of mozzarella, crumbed, fried and served with salad and veg... delicious! Anyone who might call them balls would have to be completely delirious (try square, flat, misshapen head... etc etc), but they were yum, and loads of fun for us to eat with our fingers with our wild boys, "stretchy cheese" ooozing out of the balls as we bit into them.

On a completely different note, I have also been go go go-ing for it with crocheting for Christmas. Yep, it's October! So what better thing to be doing than crafting up a storm for the lovelies in my life
.

I found the pattern below in another gorgeous vintage crochet book - Motif Crochet, a Coats Sewing Group Book No. 1010 - that Ipicked up at the opshop for just 50 cents - hooray! This motif comes from the Motif Stole on page 12, however it has another life intended, as crocheted coasters. Gorgeous. I'll make a set in this wool, but would also love to see this motif in a range of brights.

Other crafting has been underway, a stretchy dress refashioned for the summer, etc etc .... but more later (rest time is over for another day).

Chat soon lovelies xx


19 September, 2011

pinspiration monday!


I have been coveting one of these or one of these fabric necklaces for ages, and have posted loads of these, or variations thereof, on my pinterest. So, on a stashbusting mission, off I went. I need to give thanks to the lovely Melissa, without her tutorial, I probably would not have been spending nap time this way, today.
Okay, so here we go...

From a green stretch fabric scrap (could have used an old stretch top - next time) I gave the rotary cutter a workout and cut five looong strips no more than 1.5-2cm wide (sorry, imperial peoples - maybe 1/2-3/4 inch?). Then The Gherkin and I played tug-o-war with the strips, til they were all curled over on themselves and were starting to look more like yarn (or zpaghetti).

Then, The Gherkin out of the house for a while, and Little Pickles faaaast asleep, I got to work!
I decided I wanted a mix of plaited (braided) and plain curled fabric, so my steps are a wee bit different from the original sources.


Step 1.
Tie a big ol' knot to join together three strips at one end. Plait (braid) away, until you think you've had enough. Something I discovered, was if you stretch the fabric while you are plaiting, you'll get a narrower, longer plait... see what you like, and do it your way! Tie another big knot. (or you could pin at this point but I am more of a lunky knot kind of gal... we're going to cut the knots off later, anyway.


Step 2.
Lay your plaited fabric on a flat surface, and then loop your long, non-plaited strips back and forth, back and forth, next to the plaited strip.


You can then pin one side of the looped ends together with the plaited end on the same side, or you can just cross your fingers as you carry it all to the machine.

Step 3.
Pop the ends you have gathered together under your machine foot and go back and forth, back and forth, until you think it will stay together.


This is when I then had a play to make sure I would be happy with the look of the finished product. Have a play. If you think you would like the plain fabric strips wrapped around the plaited strip, do this now, if you think you would like the plait to lie flat, do that.

And then get your other ends together and sew across these.

You now should have one "group" of fabric strips that have been sewn together at each end (and this is when I cut my big lunky knots off).

Step 4.
Now, stitch these ends together, one on top of the other. Now you have a loop. It's starting to look like a necklace now, right?

Step 5.
Find a wee scrap of the same stretch fabric and wrap it around the joined ends, as many times as you like. You could then stitch this in place, but I did some cheeky weaving in with my crochet hook... ;)


Step 6.
Check yourself out in the mirror! Lovely. Now, if you had been previously inspired (as I had) by this gorgeous pic, you may also have made it the right size to fit your head, too. Hooray!


ha ha love this cool backdrop???
what to do when the room is a pigsty.... sit in front of the towels on the clothes horse, of course!

Enjoy lovelies - do let me know if you have made on of your own. I am thinking, next one will be coral and egg yolk yellow. Or, maybe mustard with grey? Or pink. Yeah, maybe just pink. xo

16 September, 2011

The Big Reveal


So, here he is in his new favourite thing - a blue, sparkly tutu. I hope it is okay to confess here that I used the cheeky no-sew method! I am also sorry that I can't remember the original source for this (thought it was sew mama sew but now can't seem to find it), but I do know that if you pop it into Dr Google a thousand results will come up!

But here is my super-easy version:

Step 1: Sew a "tube" of elastic to fit small person, ie. just get a piece of elastic that would fit round her/his middle and then sew the ends together).

Step 2: Cut piles of tulle into 10-20cm wide strips, I did these of varying length, but you could be more even with it... you may even work out the perfect length by measuring up your wee person! Our tutu is a bit chaotic, so is more like a wild faerie tutu, than that of a prima ballerina! Yippee for rotary cutters! I think I ended up with about thirty to forty strips.

Step 3: I then mixed all of the strips into a big pile, to pop them on randomly, but some of you might like to work more neatly ;) Fold one strip of tulle in half, put the loop at the centre behind and above the elastic with the ends hanging down behind the elastic. Then pull the ends up in front of the elastic and through the loops. I'll pop photos here soon (have to take pics in daylight).

Step 4: Repeat til you're done!

Happy tutu-ing! Oh! and jut in case you thought The Gherkin just at sat around looking gorgeousin his tutu:


Have a lovely weekend! xo

secret mummy's business


secret mummy's business, originally uploaded by summer pickles.

Shhhh... secret mummy's business underway.

I won't do the big reveal until The Gherkin has seen it, but I can tell you that there is now silver and blue glitter from one end of our house to the other...

Chat soon xo

15 September, 2011

thrifty thursday returns!

Another day, another opshop!


Those of you who know me well know I love the 70s. Love the greens, love the mustards, love the burnt oranges... So imagine my delight when I stumbled across these lovely mugs!

I was so excited to find this gorgeous little squirrel, especially after having found an acorn sugar bowl a few weeks ago. Suzie the squirrel was made in Japan, and is a little irregular --- but so sweet! (and terribly out of focus, it seems! - apologies for this photo!) 


Oooh! and this painting, which I actually bought for the frame - had some big plans in mind for this, but Mr Pickles & I have since fallen for this painting, so it seems the plans will have to wait until another frame comes my way.

Oooh! Oooh! and some flying duck fabric (!) which shall be revealed later (I have exciting plans for this one).

And just because, here is my wee one, our little pickle, in a quiet moment this week. And yes, this is that blanket...  [Sigh] He's so lovely.


Have fun lovelies xo

05 September, 2011

Pinspiration monday

Well, hello!

I have been spending ridiculous amounts of time in front of pinterest. Typically whilst waiting for dinner to cook, or for the boys to get to sleep (and stay in bed). And it is a brilliant source of inspiration!!

So, rather than just pinning the things that have inspired me for the weeek, I have decided to pop them in here too (with credit to the likes of http://dreamgreendiy.com/ for the idea for pinspiration mondays...).

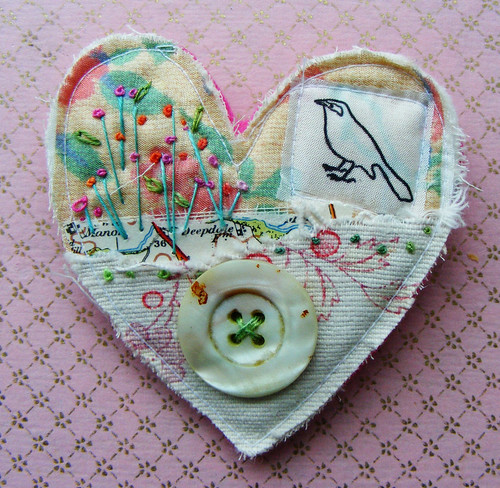
And what better way to kick off than to share with you some gorgeous broochy goodness.

textile collage brooch


Not a brooch, of course, but this would be so sweet as a brooch!

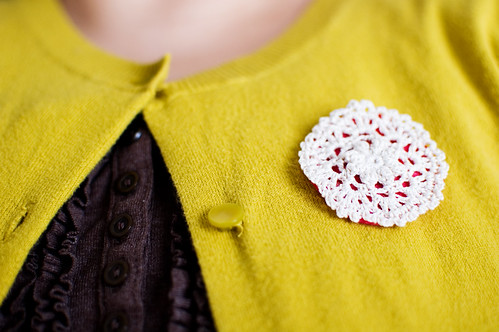
45.365: ruffles and a doily


I was originally planning to make my own nautical anchor brooch, something like this one from modcloth, after remaining empty handed after searches on etsy and madeit...
...that is until my (new but completely lovely) friends at found: the store spoke with their friends at red revival who custom made me this lovely thing (sorry for the fuzzy shot - I am still the owner of a very "retro" mobile phone with a shonky donkey camera).

Oh! and on the dress front? Lots of unpicking to do, I'm afraid. I am learning to read the pattern reviews before I start - loads of reviews online telling me that the Butterick B5210 has plenty of "ease" (the technical term for saggy baggy?) and that I may want to make 1-2 sizes down. Sigh. Oh, well, a good lesson learnt!

Chat soon xo

28 August, 2011

new year's resolution results in less than successful dressmaking.

the saggy baggy elephant by kathryn jackson


Imagine....

Little Pickle asleep. The Gherkin at occasional care. Me, on the loungeroom floor, cutting fabric.

Then some days later...

Little Pickle asleep. The Gherkin asleep. Both of them, snoring by 9pm. My uni work done for the week. Mr Pickles going to bed. My seizing the opportunity with both hands and heading out to the back room for some time with my fifteen year old Brother (by this I mean my sewing machine, of course). Off to sew a cute little stretch denim number, perfect for spring, over tights, tees, leggings, or bare legs with boots, or under cardis (plus brooch, of course!). I had even selected a cute black and white polka dot bias binding for the neck.

Some two hours later I had a dress! But sadly, dear reader, it does not fit. You see, the dress is supposed to be relatively loosefitting, but the gaping at the back is extreme. I had to readjust the pleats at the front as I went, but missed the work needed at the back (one day I will invest in a dressmakers dummy). So the unpicker is getting a workout this week, and I will be learning to fit a dress...

I will pop up my pre-post photos once I have finished... wish me luck!

What are your handy hint for fitting clothes? Do you make changes to the pattern before you start to sew? Or do you fit later?

I think probably those of you out there who know how to do it will not be spending this week unpicking bias tape and trying to pin something that is going on behind your back... that will be me. But, you know, I am not dreading it as much as perhaps I could be - I am still on track for ticking off one of my crafty resolutions of the year - yippee!

Chat soon lovelies, xo

21 August, 2011

wally, i love you.


[sigh]

Went to see this wonderful man last night at the Opera House. And he was wonderful. Just wonderful. (Okay, am very aware I have just used wonderful three times, but, well, he was.).

Also exciting of course was the fact that Mr Pickles and I were out and minus children (!) and had an overnight stay in the city. It was the first time we had been alone for an overnight stay in over three years. Too long. So lovely to spend some time with my man in our new city.

Oh! and because we saw Gotye (aka Wally De Backer, who was, by the way brilliant and rhythmically awesome, in the true sense of the word), we also saw the 'support act' which was Shaun Tan's The Lost Thing short film (based on one of my favourite books). And just as moving onscreen as it is in the book, perhaps more, as there were live musicians playing the score live, too...

What a great night out. And such a brilliant change from study!

I have been crafting too... more crochet, and have cut out the pieces for a dress. More next time...
xx

19 August, 2011

ugh. can't talk, studying.


Timothy Buckwalter
So much for my resolution to post at least weekly with a summary of all things crafty going on.Uni has once again taken over. Thankfully though, if all should go well this semester (a BIG if - research design is one of my subjects this semester), I will only have one semester to go. And then I will have a Masters in something not particularly useful or meaningful (!), particularly given my fulltime stay at home mummy duties, but I am sure I will get a warm inner glow of pride and self-satisfaction on graduation....

I started this degree waaaaay back in 2006 - four pregnancies, countless fertility treatment cycles, two home renovations and two beautiful boys ago. So not surprising in some ways that it has taken this long. But really completely unlike me to actually stick at something for this long, particularly something I don't really love.

It makes me think of other things I would love to be doing with my time, if I had those extra hours up my sleeve - sewing, learning patternmaking, cleaning (okay, I wouldn't love to do this, but it does need doing), having cups of tea, reading the Age on the weekend, oh! and during the week, drawing, reading books for enjoyment and stimulation (as opposed to my current diet of finance textbooks and statistical databases), sitting in the park and not worrying about the next assignment, or how I am going to fit study in this week.

Oh dear. I mentioned study, didn't I? Enough procrastinating! State government financing, here I come...

Chat soon, and with photos, promise! xo

13 July, 2011

more crocheting joy!

Yippee! This crochet bug has certainly caught me! I spent last night after the boys had gone to bed working on this little beauty:

crochet from 70s pattern book

This is the Arden from Modern Crochet by Penelope Book 3, sorry, again no year of publication, but my googling suggests this might be 1940-early 1950s. This is such a gorgeous pattern book! And whilst frowning to make sense of the pattern directions in Penelope Book 3 (what is a double treble again?), I also had on my lap my copy of Crochet Monthly number 137 (published 1990), which has a brilliant stitch and technique guide in the back.

This was so much fun, though at one stage I really thought I might throw it in... this one took me probably the better part of two to three hours (but please remember this is all still very new to me and I am still learning stitches as I go!).

On other news, both the Gherkin and Little Pickle have the flu, so days are long, but nights are, well, relatively quiet. But yesterday we had some lovely hours with the sun streaming through our windows - one of the redeeming features of this little house, and so different from both of our little terraces in sunny Melbs.

big boy blowing bubbles for little boy in highchair xo

Chat soon! xo

12 July, 2011

redesign in progress

Hi there! does my blog look a wee bit messy? sorry, just playing around in the background... it's a work in progress. Hopefully will be designed and looking beautiful again soon... xo

11 July, 2011

a happy thrifting report, and some crochet success!

Our move to Sydney has been, well, mixed. I miss sunny Brunswick with all of its stimulation, beautiful friends, food and coffee, but love being closer to family, other lovely friends, and having a backyard for the boys to run about. One of the great excitements for me, living in the Sydney 'burbs is that it seems that many of my local opshops are yet to have been discovered and picked over by professionals or serious opshoppers. Yippee! So there often fab finds to be had. Some which warrant a post of their very own.

I have recently just ventured into the land of crochet. I am loving having something to do whilst sitting with hubby on the lounge in front of the telly, instead of having to remove myself to the backyard shed, where my sewing machine etc lives. So when I stumbled on these eight vintage pattern books I was beside myself! And only $4.

blogged

Whilst cooking tea for the boys I picked out  few favourites to try, and then whipped this up in less than an hour - just amazing!

blogged

This is from the (red) Paragon Crochet Book - a collection of favourite Medallions (popular reprint R1 - sorry, no year of publication), and is the Star Motif. Of course the design is meant for doilies, and much finer thread, but I wanted to try a beefed up version with some chunky yarn. It photographed pretty terribly (taking photos at night will do that, but I was too excited to wait!), but it is in a soft, variegated brown and cream yarn. And it's BIG - probably about 25cm diameter.

So, now I am looking for a use for this big star motif... any ideas? Some of the patterns in this book are just gorgeous and I am beginning to think about flash crochet blankets, whizzy-bang scarves, and lah-dee-dah cushion covers...  The pattern book would have me keep going and make a trolley mat from a number of these... any other ideas?

Yippee! loving crochet!

Chat again soon xo

10 July, 2011

the gherkin is three! (and the big play kitchen reveal)

So... the day arrived. And the gherkin turned three. And the cliche that all parents repeat, in spite of themselves, enjoy every moment - it all goes so quickly, is so true. I can't believe that our little baby, who took an anxious two minutes to start breathing, was such a bright shade of jaundiced orange, was sooo very sleepy, is now our funny, clever chatty, all-singing all-dancing, gentle boy. He's three. And he had a blast!


He did have a cake of course, but the photo of him blowing out the candle on his birthday raisin toast is so much better.

For those of you out there, wondering about progress on the play kitchen, here is the end result.


Doesn't it look great? The gherkin loves it. A happy bonus for us, living in a teeny tiny home, is that it looks quite unobtrusive in our loungeroom where it lives permanently. Components are listed below, for those of you interested...

* It is built from the components of the RAND bedside table (thanks IKEA). We bought two, and used one in its entirety and the other for parts (a grand total of $29.98).
* The kitchen has a divider between the two sections, and a door, all made from the second bedside table. The door is hinged using a cabinet hinge.
* We also added a back made of masonite, which is just tacked on.
* Stove top knobs are made from cabinet knobs, as are the taps, and the tap itself is made of a U shaped handle with one side sawn off.
* We didn't like the IKEA coasters as hot plates, so instead invested in some floor protectors that you attach to the underside of your furniture and screwed those on.
* Then some eyelet hooks and a bit of elastic with a cute japanese cotton print...

...And voila!

I'll be posting on some of the foods over the next week or so, but I have a lot of crafting to share so will have to spread it all out...

Chat soon!
xo

23 June, 2011

I'm in love...

Hi all

So, my sojourn back into the paid workforce is over. What was it like? Well, I really enjoyed myself, and got to exercise my brain which was fantastic.  And the crafting time on the train was wonderful. Sadly though, this was all at the expense of time with my beautiful boys. A very sad thing. So, it's now back to being fulltime stay at home mummy.

And in preparation, I have been prowling the net, looking for some activities for the boys and i to do on those days when the park is just not going to happen. And something that doesn't involve a westfield.

And what a collection of fabulous things I have found! And all of them stored neatly in the one place thanks to Pinterest


Yep, I'm in love. All of my favourite ideas from the web catalogued in the same place, into categories that make sense to me? Sounds perfect. Then to have the opportunity too to connect with some of my very favourite people there too... I'm in love.

Thanks

to my other half who puts up with the mess, makes me happy and keeps me sane.
to my beautiful boys who give me so much i want to remember and make the everyday something to treasure.
to my mum who alway let me play with fabric and the good scissors, and who knows a lot of songs.
to my dad who was always happy for us to make a mess and who laughs at us when we deserve it.
to both parents for making sure i still got the work done.
to my dear friends for listening and for sharing the laughs.
and, to you for visiting!